💥Fully Operational💥


Ariel
-
Posts
60 -
Joined
-
Last visited
-
Days Won
1
Content Type
Profiles
Forums
Store
Downloads
Everything posted by Ariel
-
BO6 has now been released and tested as SAFE INFO: https://gcaimx.net/forums/topic/5198-call-of-duty-bo6-external/
-
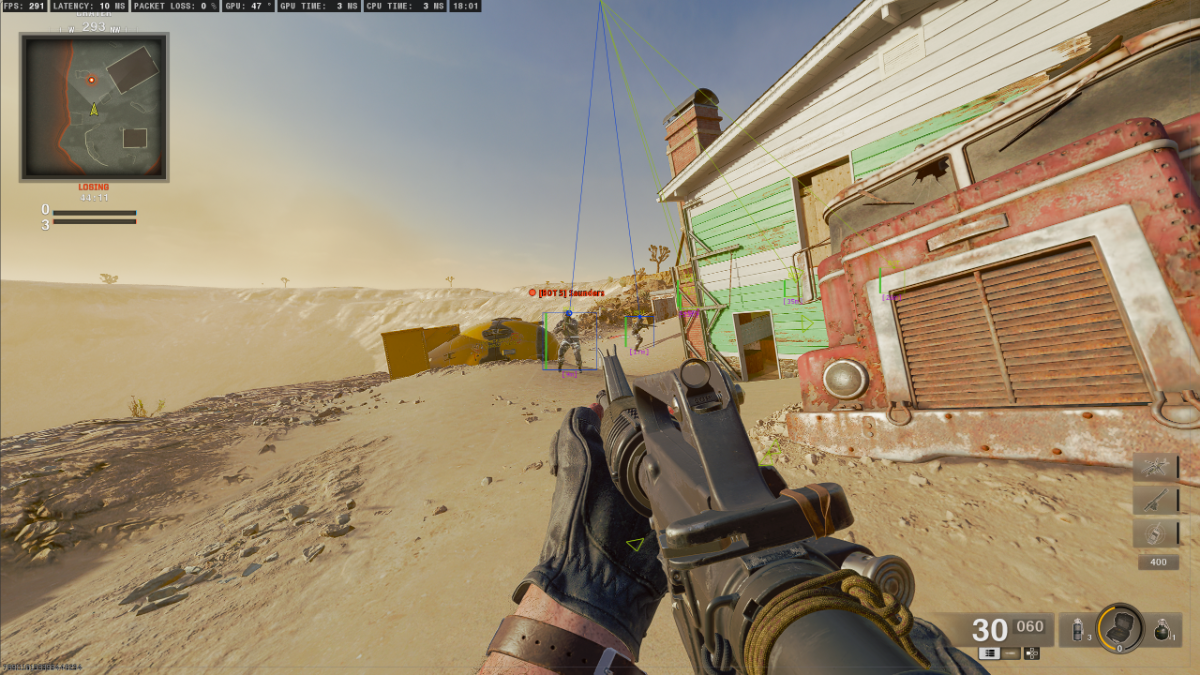
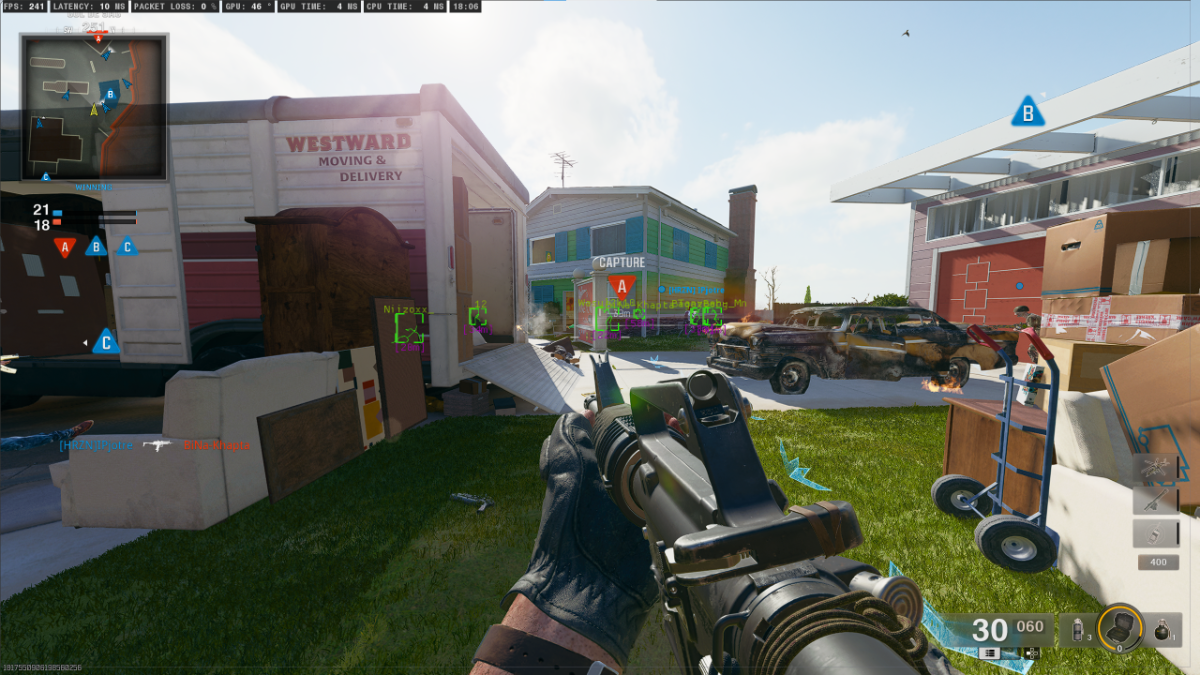
CALL OF DUTY BO6 (Black Ops 6): Safe to use on your main accounts Aimbot Features: ✅ Enable ✅ Save Target ✅ Aim Lock ✅ Visibility Check ✅ Ignore Knocked Players ✅ Draw FOV ✅ Draw Crosshair ✅ Draw Target ✅ Adjustable Target Type ✅ Custom Draw Thickness ✅ Hitbox Selection ✅ FOV Control ✅ Adjustable Minimum/Maximum Aim Time ✅ Max Distance Control Visual Features: Items: ✅ Enable ✅ Max Distance Control ✅ Custom Font Size ✅ Ammo Types (Assault Rifle, Pistol, SMG, Shotgun, Sniper, Rocket) ✅ Cash Detection ✅ Armor Detection ✅ Grenades Detection ✅ Crates Detection ✅ Boxes Detection ✅ Missions Detection ✅ Perks Detection ✅ Knifes Detection ✅ Stim Detection ✅ DMZ Detection Players: ✅ Enable ✅ Max Distance Display ✅ Custom Font Size ✅ Box Display (Custom Type & Thickness) ✅ Line Display (Custom Position & Thickness) ✅ Health Bar (Custom Thickness & Type) ✅ Skeleton View (Custom Thickness) ✅ Nickname Display ✅ Distance Display ✅ Head Circle Indicator ✅ Out of Screen Indicator (Custom Type, FOV, Thickness & Size) Radar: ✅ Enable ✅ Custom Position (X, Y) ✅ Custom Size and Zoom ✅ Visible Color Customization ✅ Max Distance Control Keybindings: ✅ Aimbot: Primary & Secondary Hold, Switch to Head, Toggle ✅ Visuals: Toggle Players, Bots, Items, Radar ✅ Menu: Open/Close Colors: Customizable colors for: ✅ Aimbot FOV, Crosshair, Target ✅ Players: Visible, Non-visible, Nickname, Distance ✅ Radar Enemies and Visible Indicators Additional Features: Fully customizable settings Streamsafe (Safe to use while streaming) Detailed feature definition included for easy configuration Zombies Support (ESP + Aimbot) Bots Support (ESP + Aimbot) Compatible with Battlenet, Steam & Gamepass bo6menu.mp4 The Call of Duty BO6 External Cheat on GCAIMX offers an extensive cheat package for Call of Duty: Black Ops 6 with features like aimbot, visual enhancements, and radar. The aimbot allows for precise targeting with customizable settings such as FOV, crosshair, and hitbox selection. The visual features enable detection of ammo types, armor, grenades, and cash, as well as detailed player visuals, including health bars, distance indicators, and skeleton views. Additional features include customizable keybindings, stream-safe functionality, and compatibility with Battlenet, Steam, and Gamepass. The cheat provides complete flexibility with fully adjustable settings, ensuring both an enhanced gaming experience and safety from detection. The package is designed for users who want tactical advantages in a competitive environment while keeping their accounts secure.

-
A new cheat loader, developed by GACIMX, offers a user-friendly interface and streamlined functionality. This video showcases a demonstration of its features, highlighting its ease of use and efficiency. I have also a added a new all in one installer for user convenience Everything is available to download now.
-
Buy here PUBG: Aimbot Features: ✅ Enable ✅ Save Target ✅ Aim Lock ✅ Visibility Check ✅ Humanized Smooth Aim ✅ Predictive Accuracy ✅ Recoil Control ✅ Draw FOV ✅ Draw Crosshair ✅ Draw Target ✅ Adjustable Target Type ✅ Custom Draw Thickness ✅ Hitbox Selection ✅ Adjustable FOV ✅ Custom Smooth and Humanized Smooth Percent ✅ Max Distance Control Visual Features: Players: ✅ Enable ✅ Max Distance Display ✅ Custom Font Size ✅ Head Circle Indicator ✅ Distance Display ✅ Nickname Display ✅ Box Display (Custom Type & Thickness) ✅ Line Display (Custom Position & Thickness) ✅ Health Bar (Custom Type & Thickness) ✅ Groggy (Knocked) Player Display (Custom Type & Thickness) ✅ Skeleton Display ✅ Out of Screen Indicator (Custom Type, FOV, Thickness & Size) Radar: ✅ Enable ✅ Custom Position (X, Y) ✅ Custom Size and Zoom ✅ Visible Color Customization ✅ Closest Enemy Color Highlight ✅ Max Distance Control Keybindings: ✅ Aimbot: Primary & Secondary Hold, Switch to Head, Toggle ✅ Visuals: Toggle Players, Toggle Radar ✅ Menu: Open/Close Colors: Customizable colors for: ✅ Aimbot FOV, Crosshair, Target ✅ Players: Visible, Non-visible, Nickname, Distance ✅ Radar Enemies, Visible Indicators, Closest Enemy Additional Features: Fully customizable settings Streamsafe (Safe to use while streaming) Detailed feature definition included for easy configuration Compatible with Steam Platform Spoofer included! In menu Controller Support The PUBG Cheat forum on GCAIMX offers detailed features for enhancing your gameplay in PlayerUnknown’s Battlegrounds (PUBG). Key features include an aimbot with customizable FOV, target type, smooth aim, recoil control, and hitbox selection. The visuals allow players to display health bars, skeletons, player distance, and other indicators like knocked players and out-of-screen indicators. The radar shows enemies and allows for customization with different colors, zoom levels, and position adjustments. Additional features like keybindings for aimbot and visuals, stream-safe compatibility, and a controller support option ensure flexibility. It’s also compatible with Steam, includes a spoofer for added protection, and offers a fully customizable settings interface.
-
1. Prepare Your Enigma 2 Device Ensure your Enigma 2 device is connected to your TV and the internet. You’ll need to install a plugin called XtreamTV or use Putty to add the IPTV subscription via Xtream Codes. 2. Install the XtreamTV Plugin (if not already installed) Option 1: Manual Installation Download the XtreamTV plugin from your IPTV provider's website or another trusted source. Transfer the plugin file to your Enigma 2 device via FTP. You can use FTP software like FileZilla. Connect to your Enigma 2 device using FTP: Host: Your Enigma 2 device IP address Username: root Password: Usually blank or dreambox Upload the plugin file to the /tmp/ directory. On your Enigma 2 device, go to Menu > Setup > Software Management > Install local extension. Select the plugin file you uploaded and install it. Restart your Enigma 2 device. Option 2: Use Putty to Install Plugin Download Putty on your computer. Open Putty and enter the IP address of your Enigma 2 device, then click Open. Login using: Username: root Run the following command (replace http://example.com/xtreamtv.ipk with the actual URL provided by your IPTV provider): wget http://example.com/xtreamtv.ipk -O /tmp/xtreamtv.ipk Then install the plugin with: opkg install /tmp/xtreamtv.ipk Restart your Enigma 2 device. 3. Set Up IPTV with Xtream Codes in XtreamTV Plugin Step 1: Open the XtreamTV plugin on your Enigma 2 device. Step 2: You should see a screen asking for activation. The activation URL or code is usually provided by your IPTV provider. Step 3: Enter the Xtream Codes details: Username: (Your IPTV username) Password: (Your IPTV password) Server URL: (The URL provided by your IPTV provider, e.g., http://yourprovider.com:8080) Step 4: Once the details are entered, your IPTV channels should start loading. 4. Set Up IPTV via M3U Playlist (Alternative Method) If your IPTV provider doesn’t support the XtreamTV plugin, you can use an M3U playlist: Obtain the M3U playlist URL from your IPTV provider. Use an FTP client like FileZilla to connect to your Enigma 2 device. Upload the M3U playlist to the /etc/enigma2/ directory. Reboot your device. Your channels should now appear under Favorites or a similar section. 5. Start Watching Navigate through the IPTV channels on your Enigma 2 device using the XtreamTV plugin or M3U playlist. 6. Troubleshooting (if needed) If the channels don’t load: Double-check your Xtream Codes credentials (username, password, server URL). Ensure your internet connection is stable. Reboot your device and try again. 7. Optional: Use EPG (Electronic Program Guide) Many IPTV providers offer an EPG link that you can add to your Enigma 2 setup for a guide to what’s on each channel. This can usually be added through the plugin settings or by modifying the M3U playlist.
-
1. Power On and Connect Your MAG Device Connect your MAG device to your TV using an HDMI cable. Power on the device and connect it to the internet via Ethernet or Wi-Fi. 2. Access the MAG Device Settings Once the device is powered on and connected, you’ll see the main screen. Using your remote, navigate to Settings. 3. Set Up the Portal In the Settings menu, select System Settings. Then, go to Servers and choose Portals. 4. Configure the Portal In the Portals menu, you’ll find two fields: Portal 1 name and Portal 1 URL. Portal 1 name: Enter a name for the portal (e.g., "My IPTV"). Portal 1 URL: Enter the server URL provided by your IPTV service provider (e.g., http://yourprovider.com:8080/c). If your provider has given you a specific Xtream Codes URL, you can use that here. 5. Save the Configuration After entering the details, press the OK or Save button on your remote to save the configuration. 6. Reboot Your MAG Device Once the portal is configured and saved, go back to the main menu. Reboot your MAG device by unplugging it from the power source and then plugging it back in. 7. Login with Xtream Codes After rebooting, your MAG device should automatically load the IPTV portal you just configured. When prompted, enter your Xtream Codes username and password provided by your IPTV provider. The MAG device will authenticate and load the IPTV channels. 8. Start Watching Once authenticated, you’ll see the list of available channels, VODs (Video on Demand), and other IPTV content. Use your remote to browse and select the content you wish to watch. 9. Troubleshooting (if needed) If channels don’t load or you encounter issues: Double-check the portal URL and ensure it’s correctly entered. Verify your Xtream Codes username and password. Ensure your internet connection is stable. Try rebooting the device again.
-
1. Download an IPTV App For iOS devices, IPTV Smarters Lite and GSE Smart IPTV are popular apps that support Xtream Codes. To download IPTV Smarters Pro: Open the App Store on your iPhone or iPad. Search for "IPTV Smarters LITE". Select the app and tap Get to install it. To download GSE Smart IPTV: Open the App Store on your iPhone or iPad. Search for "GSE Smart IPTV". Select the app and tap Get to install it. 2. Launch the IPTV App Once installed, open IPTV Smarters LITE or GSE Smart IPTV on your iOS device. 3. Set Up IPTV with Xtream Codes in IPTV Smarters LITE Step 1: On the IPTV Smarters Pro home screen, select Add New User. Step 2: Choose Login with Xtream Codes API. Step 3: Enter the following details: Any Name: (Enter a name for your profile, e.g., My IPTV) Username: (Your IPTV username provided by your IPTV service provider) Password: (Your IPTV password provided by your IPTV service provider) URL: (The server URL provided by your IPTV service provider, e.g., http://yourprovider.com:8080) Step 4: Click Add User. Step 5: Your channels and content will start loading automatically. 4. Set Up IPTV with Xtream Codes in GSE Smart IPTV Step 1: Open GSE Smart IPTV. Step 2: Tap on the Menu (three horizontal lines) in the top left corner. Step 3: Select Xtream Codes API. Step 4: Tap on the + button to add a new Xtream Codes API. Step 5: Enter the following details: Name: (Enter a name for your profile, e.g., My IPTV) Server URL: (The server URL provided by your IPTV service provider, e.g., http://yourprovider.com:8080) Username: (Your IPTV username provided by your IPTV service provider) Password: (Your IPTV password provided by your IPTV service provider) Step 6: Tap Add. Step 7: Your channels and content should start loading. 5. Customize Settings (Optional) Adjust settings such as EPG (Electronic Program Guide), streaming quality, and buffer size within the app to enhance your viewing experience. 6. Start Watching After setup, you can browse through the categories in IPTV Smarters lite or GSE Smart IPTV to access live TV, movies, series, and more. 7. Troubleshooting (if needed) If channels don’t load or streams don’t work: Double-check the Xtream Codes API details (username, password, and URL) you entered. Ensure your internet connection is stable. Restart the app or your iOS device if necessary.
-
If using the GCAIMX IPTV make sure TiviMate is uninstalled if you have it. 1. Download the GCAIMX IPTV Application The GCAIMX IPTV app is a powerful and user-friendly app designed to enhance your IPTV experience. Follow these steps to download and install the APK file directly: To download the GCAIMX IPTV APK: Click here to download the GCAIMX IPTV APK Once downloaded, you will need to allow the installation of apps from unknown sources on your Android device. How to enable installation from unknown sources: For Android 8.0 and higher: Go to Settings > Apps & notifications. Select the browser or file manager where you downloaded the APK. Tap Install unknown apps and toggle on the permission. For older versions of Android: Go to Settings > Security. Scroll down to find the Unknown sources option and enable it. 2. Install and Launch the GCAIMX IPTV App After enabling installation from unknown sources, locate the downloaded APK file (usually in your "Downloads" folder). Tap the APK file to start the installation process. Once installed, open the GCAIMX IPTV app on your Android device. 3. Set Up IPTV with Xtream Codes API Follow these steps to configure your IPTV account within the GCAIMX IPTV app: Step 1: On the home screen of the GCAIMX IPTV app, select Add New User. Step 2: Choose the option Login with Xtream Codes API. Step 3: Enter the following details provided by your IPTV service provider: Any Name: (Enter a name for your profile, e.g., My IPTV) Username: (Your IPTV username) Password: (Your IPTV password) Step 4: Click Add User. Step 5: Your IPTV channels and content will load automatically. 4. Customize Settings (Optional) You can customize your experience within the GCAIMX IPTV app by adjusting settings like: EPG (Electronic Program Guide): Sync your TV guide for easy channel navigation. Streaming quality: Set your preferred streaming resolution. Buffer size: Adjust the buffer size to optimize performance. 5. Start Watching Once the setup is complete, navigate through the app to explore live TV channels, on-demand content, movies, and series.
-
1. Choose an IPTV Player For both Windows laptops and Macs, VLC Media Player and IPTV Smarters Pro are popular options. VLC is more basic, while IPTV Smarters Pro offers a more feature-rich experience. 2. Install IPTV Player VLC Media Player: Download VLC Media Player: Windows: Download VLC Mac: Download VLC Install VLC Media Player by following the on-screen instructions. IPTV Smarters Pro: Windows: Download IPTV Smarters Pro for Windows from their official website or a trusted source. Mac: Download IPTV Smarters Pro for Mac from their official website or a trusted source. Install the app by following the on-screen instructions. 3. Set Up IPTV with Xtream Codes on VLC Media Player Step 1: Open VLC Media Player. Step 2: Click on Media in the top menu and select Open Network Stream. Step 3: In the network URL field, enter your Xtream Codes URL in the following format: http://yourprovider.com:8080/get.php?username=YourUsername&password=YourPassword&type=m3u_plus&output=ts Step 4: Replace YourUsername and YourPassword with your actual Xtream Codes username and password. Step 5: Click Play to start streaming. 4. Set Up IPTV with Xtream Codes on IPTV Smarters Pro Step 1: Launch IPTV Smarters Pro on your laptop or Mac. Step 2: On the home screen, select Add New User. Step 3: Choose Login with Xtream Codes API. Step 4: Enter the following details: Any Name: (Enter a name for your profile, e.g., My IPTV) Username: (Your IPTV username provided by your IPTV service provider) Password: (Your IPTV password provided by your IPTV service provider) URL: (The server URL provided by your IPTV service provider, e.g., http://yourprovider.com:8080) Step 5: Click Add User. Step 6: Your channels and content will start loading automatically. 5. Customize Settings (Optional) Adjust settings like EPG (Electronic Program Guide), streaming quality, and buffer size within the IPTV player’s settings as needed. 6. Start Watching In VLC: Browse through the playlist to select channels and start watching. In IPTV Smarters Pro: Navigate through the interface to access live TV, movies, or series. 7. Troubleshooting (if needed) If channels don’t load or streams fail: Verify the Xtream Codes credentials (username, password, and URL). Ensure your internet connection is stable. Restart the VLC player, IPTV Smarters Pro app, or your laptop/Mac if necessary.
-
If using the GCAIMX IPTV make sure TiviMate is uninstalled if you have it. 1. Download the GCAIMX IPTV Application on Firestick To install the GCAIMX IPTV app on a Firestick, you’ll need to sideload the APK file. Follow these steps to do it safely: Step 1: Enable Installation from Unknown Sources Since the Firestick doesn't allow direct APK installation by default, you must enable the option to install apps from unknown sources. Go to the Firestick Home screen and navigate to Settings (the gear icon on the far right). Scroll to and select My Fire TV. Choose Developer Options. Turn on Apps from Unknown Sources. If prompted, confirm by selecting Turn On. Step 2: Install the Downloader App You'll need the Downloader app to download the GCAIMX IPTV APK directly onto your Firestick. From the Firestick Home screen, go to the Search icon (magnifying glass). Search for Downloader. Select the Downloader app from the search results and click Download. Once installed, open the Downloader app. Step 3: Download the GCAIMX IPTV APK In the Downloader app, click on the URL field and enter the download link for the GCAIMX IPTV APK. Link: https://bit.ly/3MxlsKm Click Go and the APK file will start downloading. You may need a download code: 649561 Once the download is complete, you’ll be prompted to install the APK. Click Install. 2. Launch the GCAIMX IPTV App After the APK is installed: Return to the Firestick Home screen and navigate to Your Apps & Channels. Scroll down until you find the GCAIMX IPTV app. Click to open the app. 3. Set Up IPTV with Xtream Codes API After launching the GCAIMX IPTV app, follow these steps to configure your IPTV account: Step 1: On the home screen of the GCAIMX IPTV app, select Add New User. Step 2: Choose the option Login with Xtream Codes API. Step 3: Enter the following details provided by your IPTV service provider: Any Name: (Enter a name for your profile, e.g., My IPTV) Username: (Your IPTV username) Password: (Your IPTV password) Step 4: Click Add User. Step 5: Your IPTV channels and content will load automatically. 4. Customize Settings (Optional) Within the GCAIMX IPTV app, you can customize the settings: EPG (Electronic Program Guide): Sync your TV guide for easier navigation. Streaming quality: Set the preferred resolution for your connection. Buffer size: Adjust the buffer to optimize for smoother streaming. 5. Start Watching Once your IPTV account is set up, you can browse through live TV channels, movies, series, and on-demand content available on your IPTV subscription. OR 1. Prepare Your Firestick Ensure your Firestick is connected to your TV and the internet. On the Firestick home screen, navigate to Settings > My Fire TV > Developer Options. Enable Apps from Unknown Sources to allow the installation of third-party apps. 2. Install a Downloader App From the Firestick home screen, go to the Search icon. Type Downloader and select the Downloader app from the search results. Install the Downloader app. Open the Downloader app, and when prompted, allow it to access your files. 3. Download IPTV Smarters Pro In the Downloader app, go to the URL field and enter: https://www.iptvsmarters.com/smarters.apk Click Go to download the IPTV Smarters Pro APK file. Once the download is complete, you’ll be prompted to install the app. Click Install. After installation, you can delete the APK file to save space. 4. Launch IPTV Smarters Pro After installation, click Open to launch IPTV Smarters Pro. You can also access it later from the Your Apps & Channels section on the Firestick home screen. 5. Set Up IPTV Smarters Pro Using Xtream Codes On the IPTV Smarters Pro home screen, select Add New User. Choose Login with Xtream Codes API. Enter the following information: Any Name: (Enter a name for your profile, e.g., My IPTV) Username: (Your IPTV username provided by your IPTV service provider) Password: (Your IPTV password provided by your IPTV service provider) URL: (The server URL provided by your IPTV service provider, e.g., http://yourprovider.com:8080) Click Add User. Your IPTV content (live TV, movies, series) should start loading automatically. 6. Customize Settings (Optional) You can adjust various settings like EPG (Electronic Program Guide), streaming quality, and buffer size within the app settings to optimize your viewing experience. 7. Start Watching Navigate through the IPTV Smarters Pro interface to access live TV, movies, and series. Enjoy streaming your content with the Xtream Codes credentials you entered. 8. Troubleshooting (if needed) If content doesn’t load or streams don’t work: Double-check your Xtream Codes API details (username, password, URL). Make sure your internet connection is stable. Restart your Firestick or the IPTV Smarters Pro app if necessary.
-
1. Check Compatibility Ensure your Smart TV supports IPTV apps that work with Xtream Codes. Most modern Smart TVs from brands like Samsung, LG, Sony, and others do. 2. Download an IPTV App Samsung Smart TV (Tizen OS): Go to the Samsung App Store on your TV. Search for "IPTV Smarters" or "Smart IPTV". Select the app and click Install. LG Smart TV (WebOS): Open the LG Content Store. Search for "IPTV Smarters" or "Smart IPTV". Download and install the app. Android Smart TVs: Open the Google Play Store. Search for "IPTV Smarters" or similar apps. Install the app. Sony Smart TVs (Android TV): Access the Google Play Store. Search for "IPTV Smarters", "Tivimate", or similar apps. Install the app. 3. Launch the IPTV App Open the installed IPTV app on your Smart TV. 4. Set Up the IPTV App Using Xtream Codes IPTV Smarters: Open the app and click on Add New User. Select Login with Xtream Codes API. Enter the following details: Any Name: (Enter a name for your profile) Username: (Your IPTV username provided by your IPTV service provider) Password: (Your IPTV password provided by your IPTV service provider) URL: (The server URL provided by your IPTV service provider, e.g., http://yourprovider.com:8080) Click Add User. Once added, your channels and content should start loading. Smart IPTV: Note: Smart IPTV typically uses M3U URLs, but if your provider uses Xtream Codes, you'll need to convert or use an app that directly supports Xtream Codes. Other Apps: If using another IPTV app, look for an option to log in using Xtream Codes API. Enter your Xtream username, password, and server URL as provided by your IPTV provider. Save the configuration and start loading the channels. 5. Customize Settings (Optional) Adjust settings like EPG (Electronic Program Guide), streaming quality, and buffer size within the app settings if needed. 6. Start Watching After the setup is complete, browse through the channels, movies, or series, and start enjoying your IPTV service. 7. Troubleshooting (if needed) If channels are not loading: Double-check the Xtream Codes credentials (username, password, and URL). Ensure your internet connection is stable. Restart your TV or the app if necessary.
-
📢 Exciting Update: Website Enhancements & Improved Status Page Dear Users, I am thrilled to announce some exciting updates to our website! As part of our ongoing commitment to improving your experience, i have implemented several enhancements that we’re eager to share with you. 🌐 Website Updates: New Design & Features: We’ve revamped our website to provide a more intuitive and user-friendly experience. Enjoy a fresh, modern look with easier navigation and access to all the resources you need. Improved Performance: Our updates include performance enhancements that ensure faster load times and a smoother browsing experience. 🔧Status Page Improvements: We understand the importance of having up-to-date information about our services. That’s why we’ve made significant improvements to our https://gcaimx.net/cheatstatus/ to enhance its functionality: Auto-Update Detection: Our status page now features auto-update detection. This means that you will receive real-time updates without needing to refresh the page manually, ensuring you’re always informed about the current status of our services. Enhanced Information Display: We’ve optimized how status information is presented, making it clearer and more accessible. Stay informed with the latest updates and any potential issues at a glance. I am dedicated to providing you with the best possible experience, and these updates are a step towards achieving that goal. We hope you find the new features and improvements valuable and look forward to your feedback. Thank you for your continued support!
-
Exciting News: A New Chapter for GCAIMX! I'm beyond thrilled to announce that I am now the proud owner and developer of GCAIMX! Taking on this role is an incredible honor, and I’m fully committed to bringing fresh energy and innovative ideas to our community. My top priority is to enhance your experience by providing even more value and delivering the best service possible. In the coming days and weeks, you’ll notice significant improvements as we work tirelessly to elevate what GCAIMX offers. Your feedback and satisfaction are at the core of everything we do, and I’m here to listen, support, and engage with you every step of the way. What’s Coming Up? One of the first enhancements you'll see is the introduction of a dedicated support ticket system directly in our Discord. This will make communication with me and the team easier and more efficient, ensuring that any issues or concerns are addressed promptly. As well as: New cheats, new offers, new prices, rewards program and a possibility of rebranding. Addressing Ongoing Issues I’m aware that some of you have experienced challenges with the account generator, and I sincerely apologize for any inconvenience this has caused. As a gesture of goodwill, I will be issuing refunds to any customer who has faced issues since August 1st, regardless of whether your subscription is still active. Please make a ticket in Discord to discuss your refund. Looking Ahead Thank you for being a part of the GCAIMX community. I can’t wait to share all the exciting updates we have in store. Your continued support means the world to me, and I’m dedicated to making GCAIMX better than ever. Here’s to a bright future and a new chapter at GCAIMX! Warm regards, Ariel